Resizing Digital Embroidery Design Files
One of the “newby” assumptions I made when I first got my Brother-PE770 Embroidery Machine was that any and all PES design files would work with the machine. Brother (and Baby Lock) embroidery design files are in the PES format and I quickly figured out that all machine brands have their own format. So I went blindly along buying cool PES design files. However, when I attempted to transfer those files into my machine using the USB drive, the machine couldn’t “see” the files. They simply wouldn’t show up on the screen. “Whaaaat? Where the heck are they???” Commence hair pulling…
I went digging through the User Guide and it only mentioned that the hoop size on the PE770 was 130mm x 180mm. OK…so? What it DOESN’T say (Brother, please take note) is that files larger than the hoop size cannot be used on the machine. Maybe they think it’s intuitive? I dunno but I was very frustrated until I figured it out. So the files had to be resized. I’m a techy kind of girl so it shouldn’t be a problem, I’d need some software – and I didn’t want to pay for it. 🙂
Well. I’ll just say that not all embroidery software is created equal. There’s a lot of freeware out there and some of them are very good at some things, and not so good at others. And most are a real PITA to use. What I came to require was 1) The software should resize without screwing up the stitch density or making the design all wonky; 2) The code shouldn’t look like it was written in Windows 98; 3) It would actually work on Windows 7; 4) It needs to be user friendly; and last but not least, 5)It should be FREE! After much searching the interweb, lo and behold in an embroidery user forum the search was over: Welcome Wilcom TruSizer!
This software is so up-to-date (I’ve already received software updates from the company…for the Free version no less!) and it’s very user friendly. It looks and operates just like Word in Microsoft Office so it’s super easy to use. And check THIS out! They also offer a mobile version – for free – so you can resize images on the go! Ha! How cool is that? It downloads very cleanly without any hidden malware/spyware (frequently found in freeware) or extra advertising crap. It puts a handy icon on my desktop too. Mind you, it’s for “resizing” only. While limited in scope, it’s VERY good at what it does.
The rest of this post is image heavy because I’ve written IT tech manuals before and if you don’t show every single step, I’ve found that users tend to get lost and then my email blows up with nasty-grams saying “YOU DIDN’T SAY TO…or YOU LEFT OUT A STEP!”. So sorry if you’re up-to-speed with the whole File/Save As concept. No insult intended.
I’m making my feline-loving friend a wall hanging for her birthday from the Cats Meow collection from Lunch Box Quilts. After dropping a significant amount of cash on this collection, I discovered that nearly all of the embroidery files are sized bigger than my hoop size so my machine can’t see them. So I had to resize them all. I’ll show you how I resized Felix – a very cool cat! To see the details in the images below, click on them and they will be big enough to see everything clearly.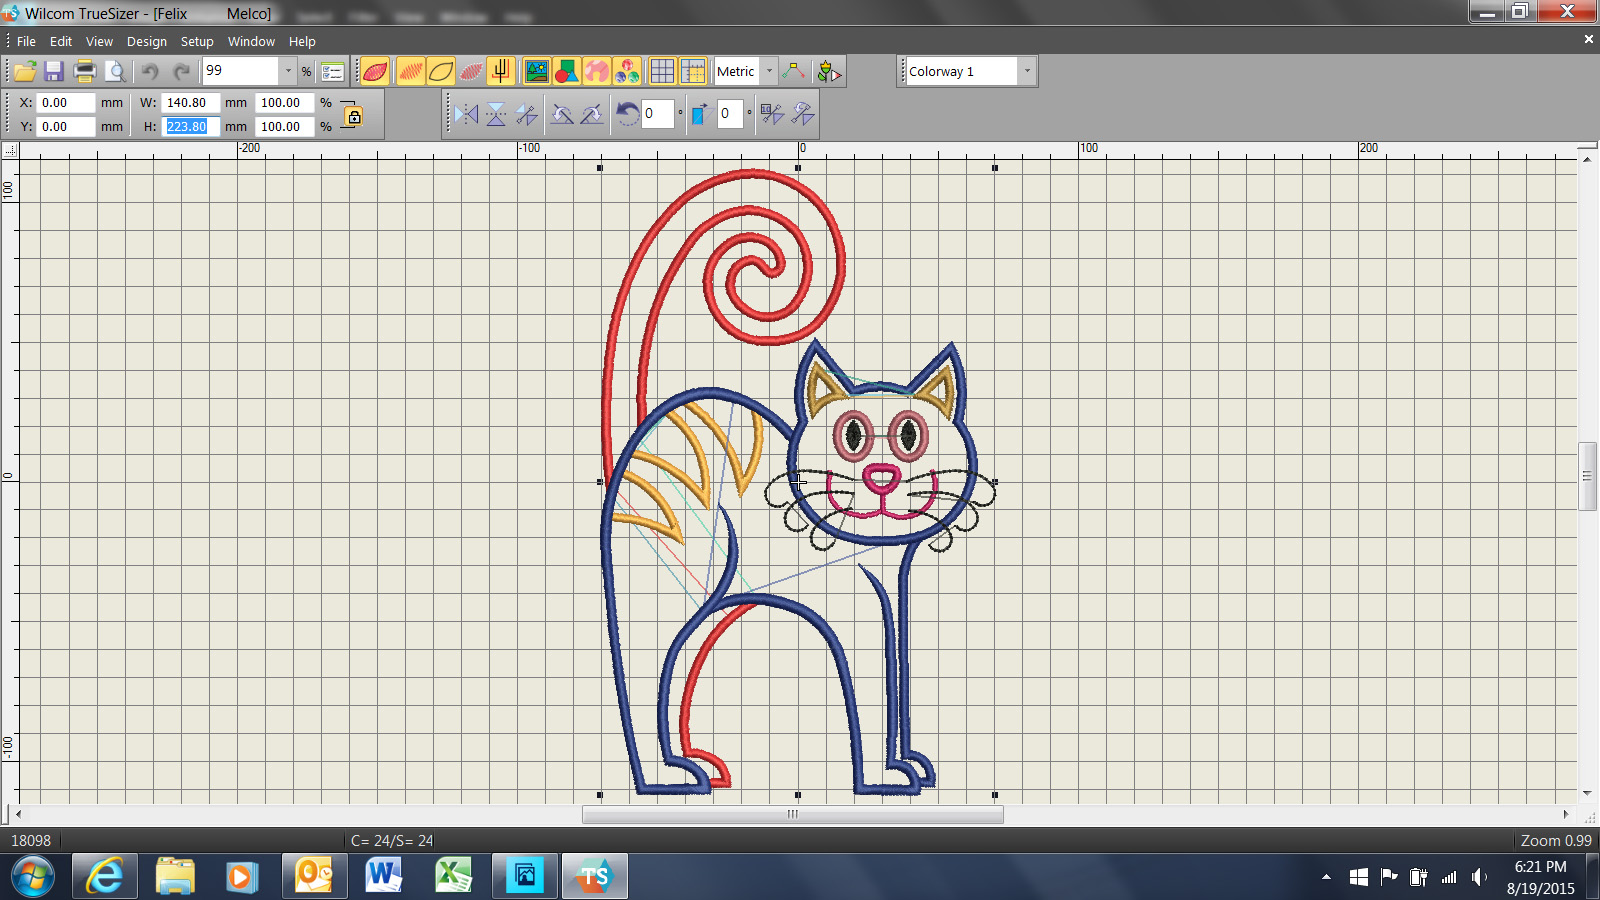
After downloading the software from the link in the company name above, double click on the TruSizer icon on your desktop. No, my home screen isn’t screwed up. I wanted to hide some icons from y’all. 🙂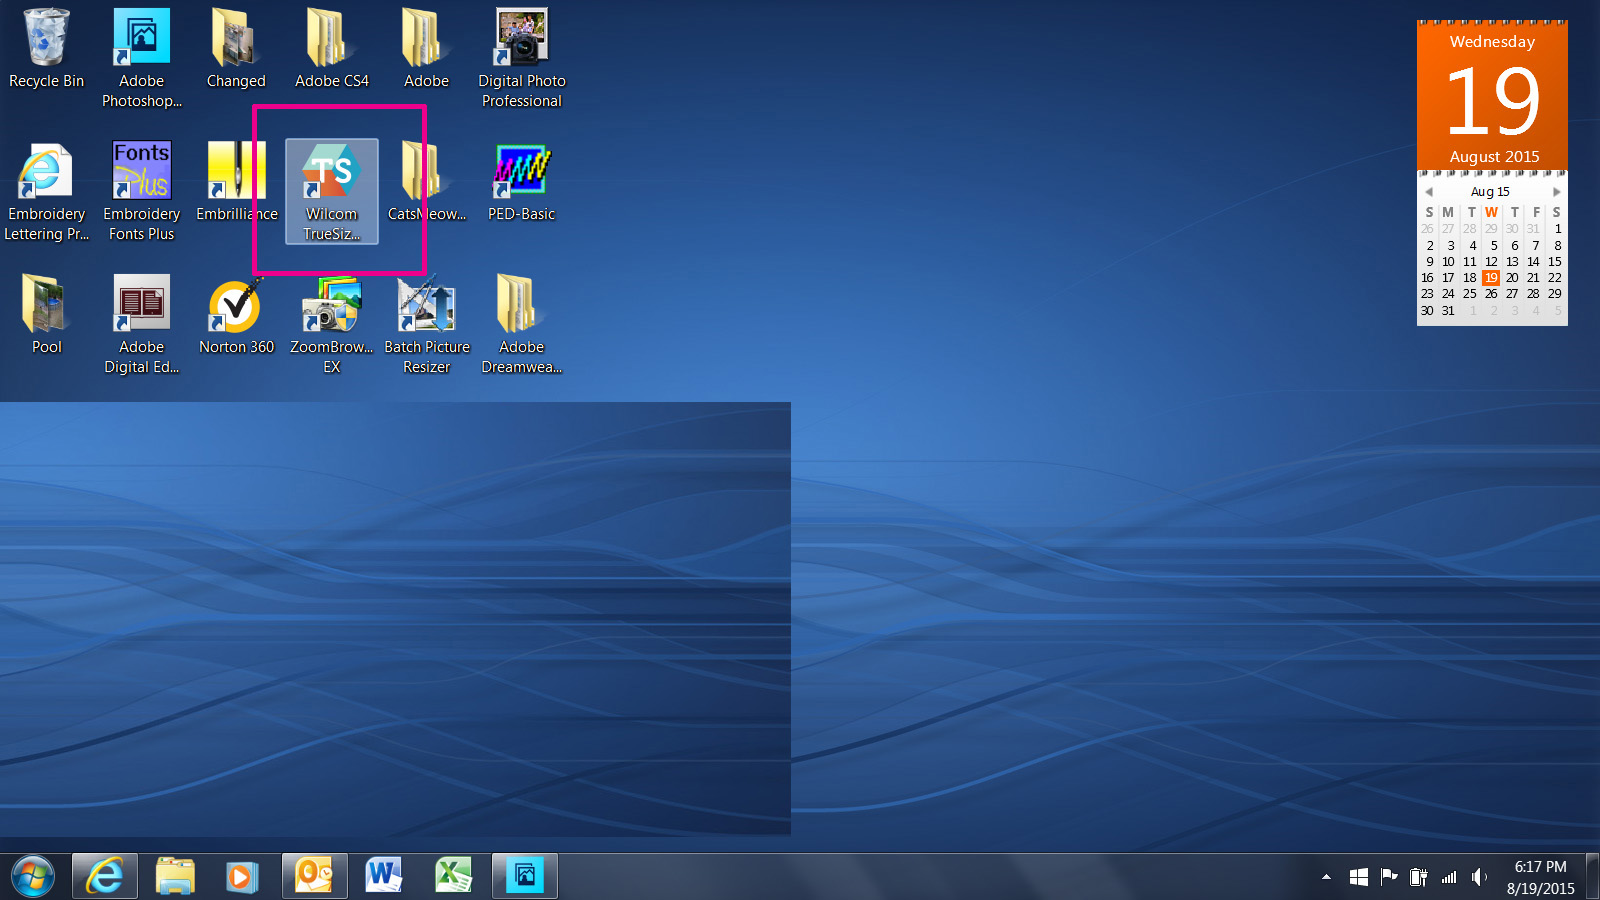 There’s a single splash page you have to click through. Click OK.
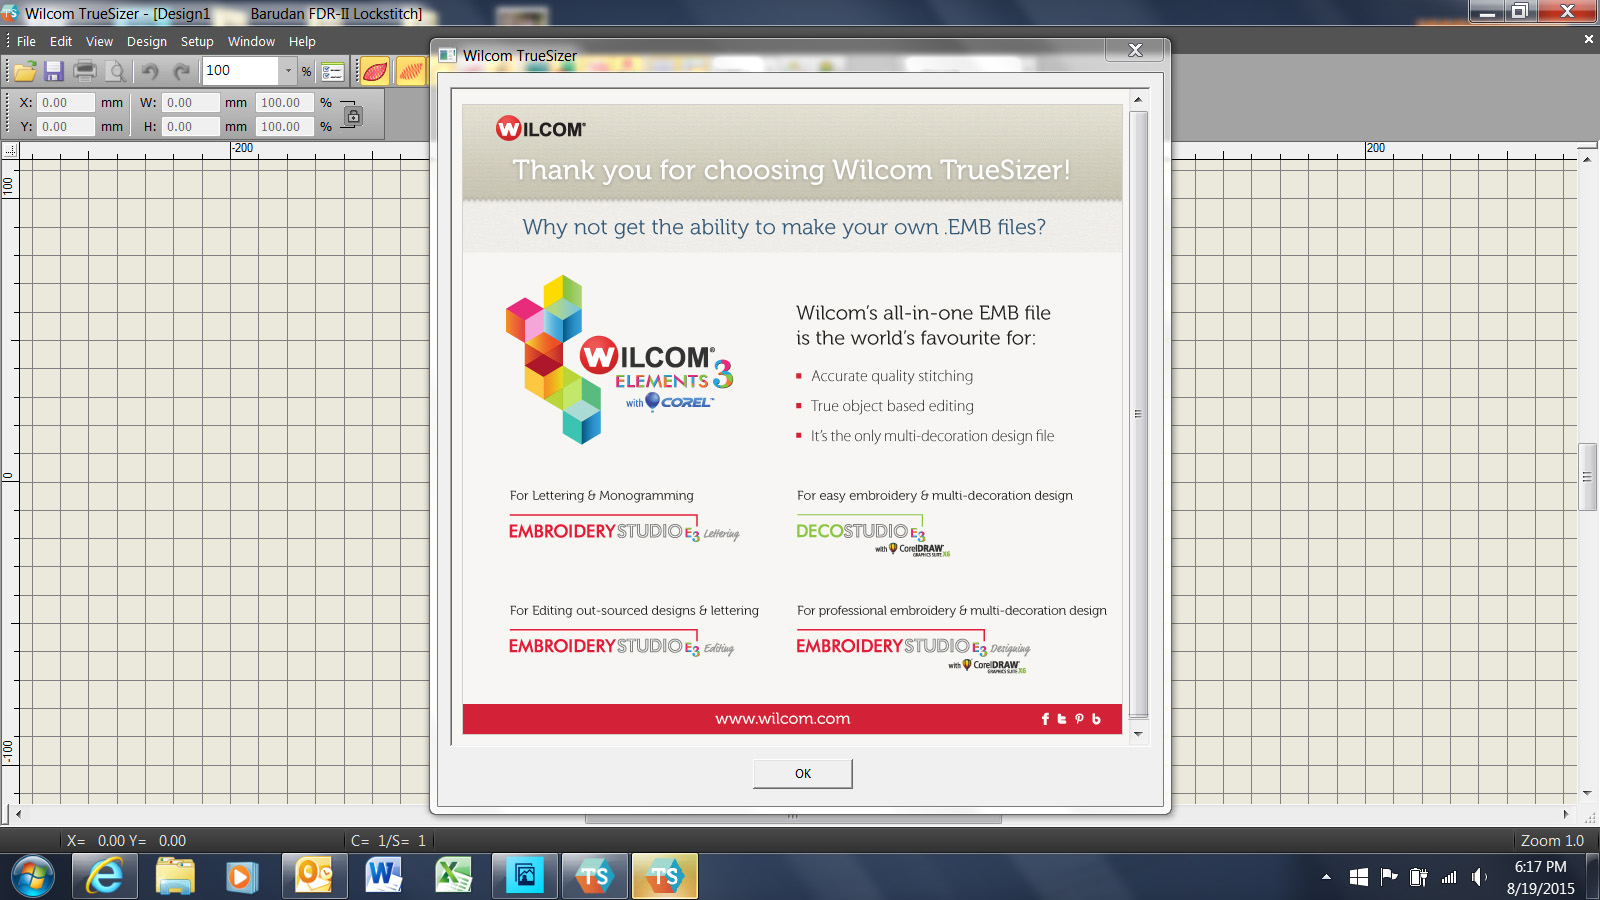 To get your original “too-big” file, go to the menu in the upper left corner and click File/Open.
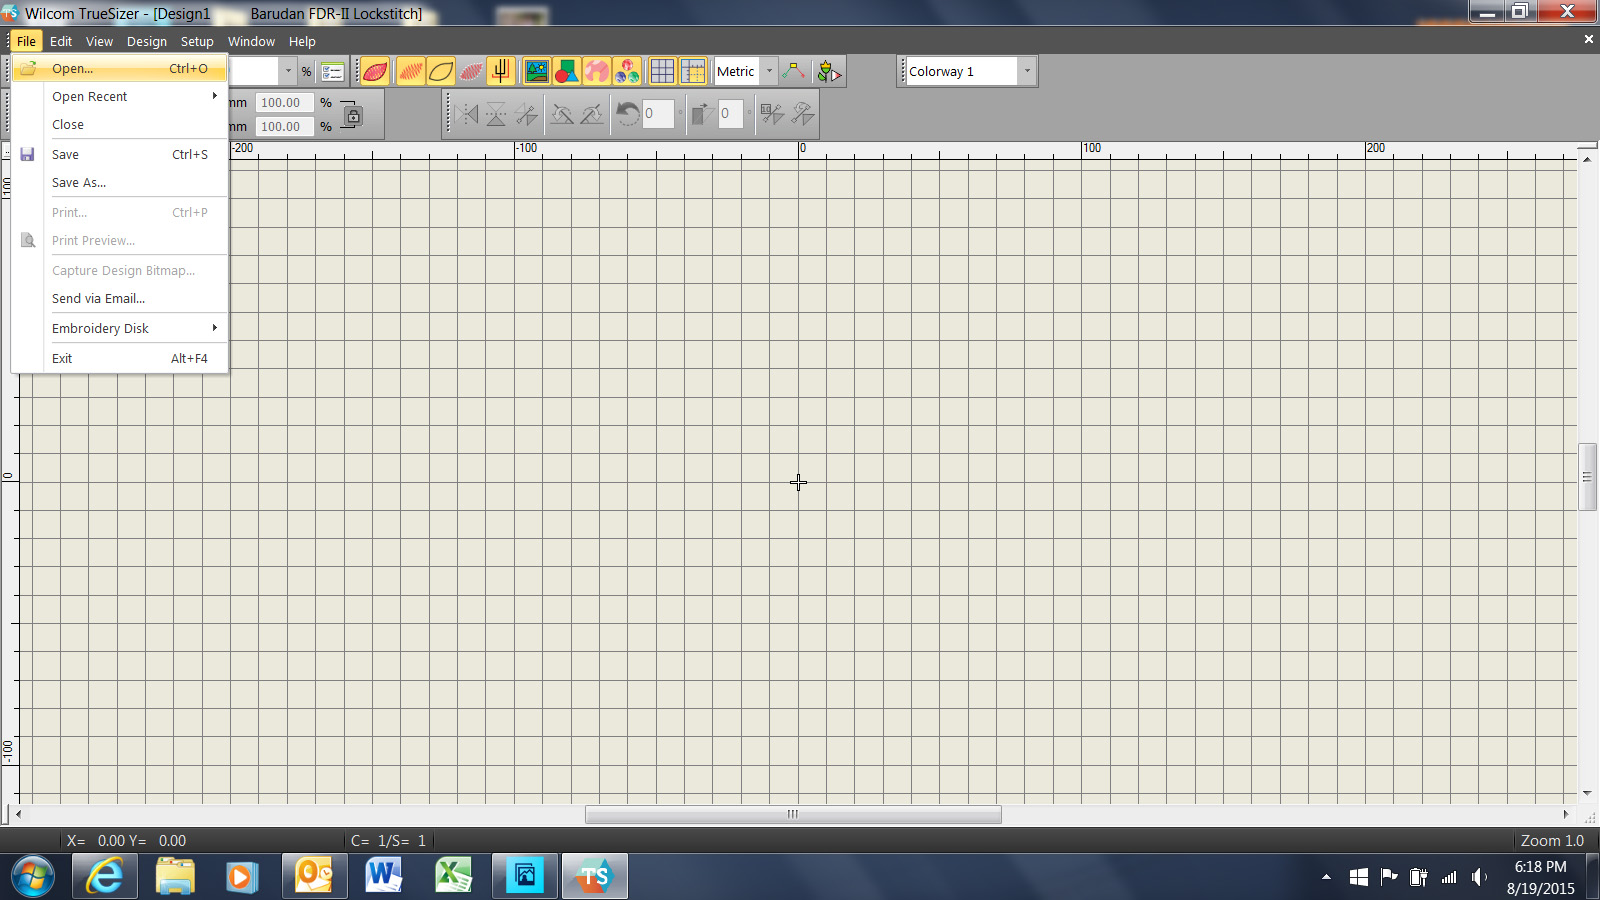 Then navigate to where you have your embroidery files stored on your computer. Note that the software defaults to the .EMB format. If you don’t change the format to PES, it won’t see your files.
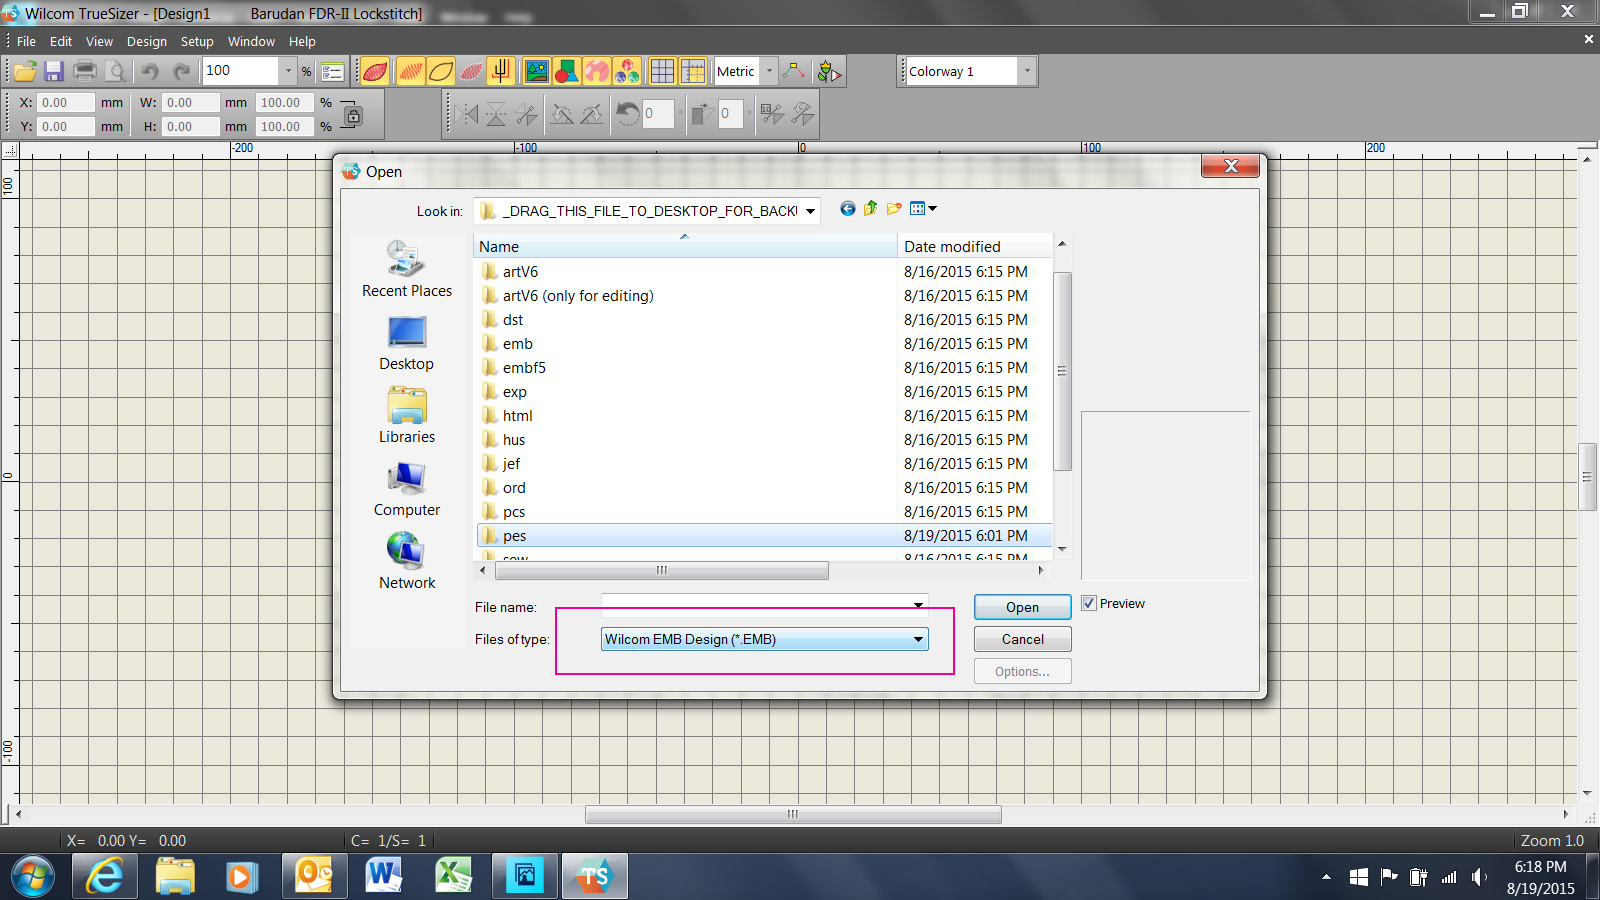
When you click the down arrow by the EMB File Type, a ginormous list of possible file types pops up. I highlighted the PES file format. Then I navigated to the original Felix file and clicked Open. Isn’t he cool?
  Once the image shows up on the screen, you have to Select the image by clicking on it. Once you do, you’ll see some little handle boxes around the image. Under the main menu bar, there are Property boxes. See how the height is more than the allowable 180mm for my machine? (highlighted in blue below)
Make sure the padlock is locked and then change the largest offending number to a number that works in your machine. 
I changed my height to 180mm and hit Enter. See how he resized perfectly. No distortion at all.
When I save my files, I do a “Save As” so I don’t destroy the original file and then give it a unique name so I can tell the original from the new. So then in the upper menu go to File/Save As and go through the routine of changing the .EMB file to your file type.
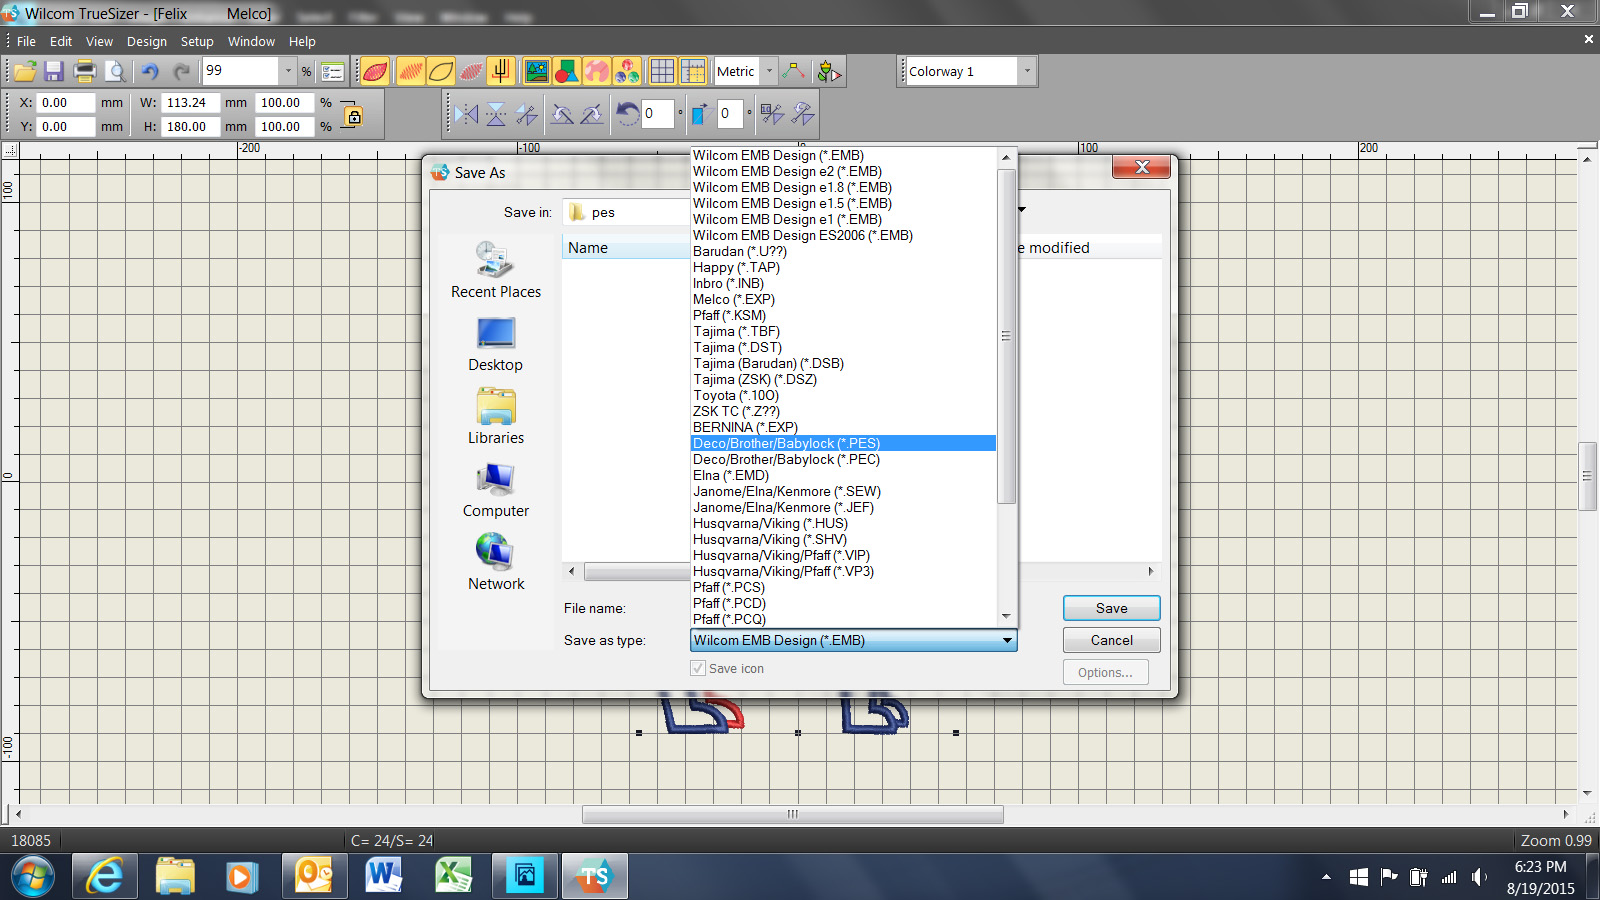
I normally use the new dimensions in the file name so I can tell it will fit in my machine and differentiate it from the original. So back to the embroidery machine I go to retrieve Felix.
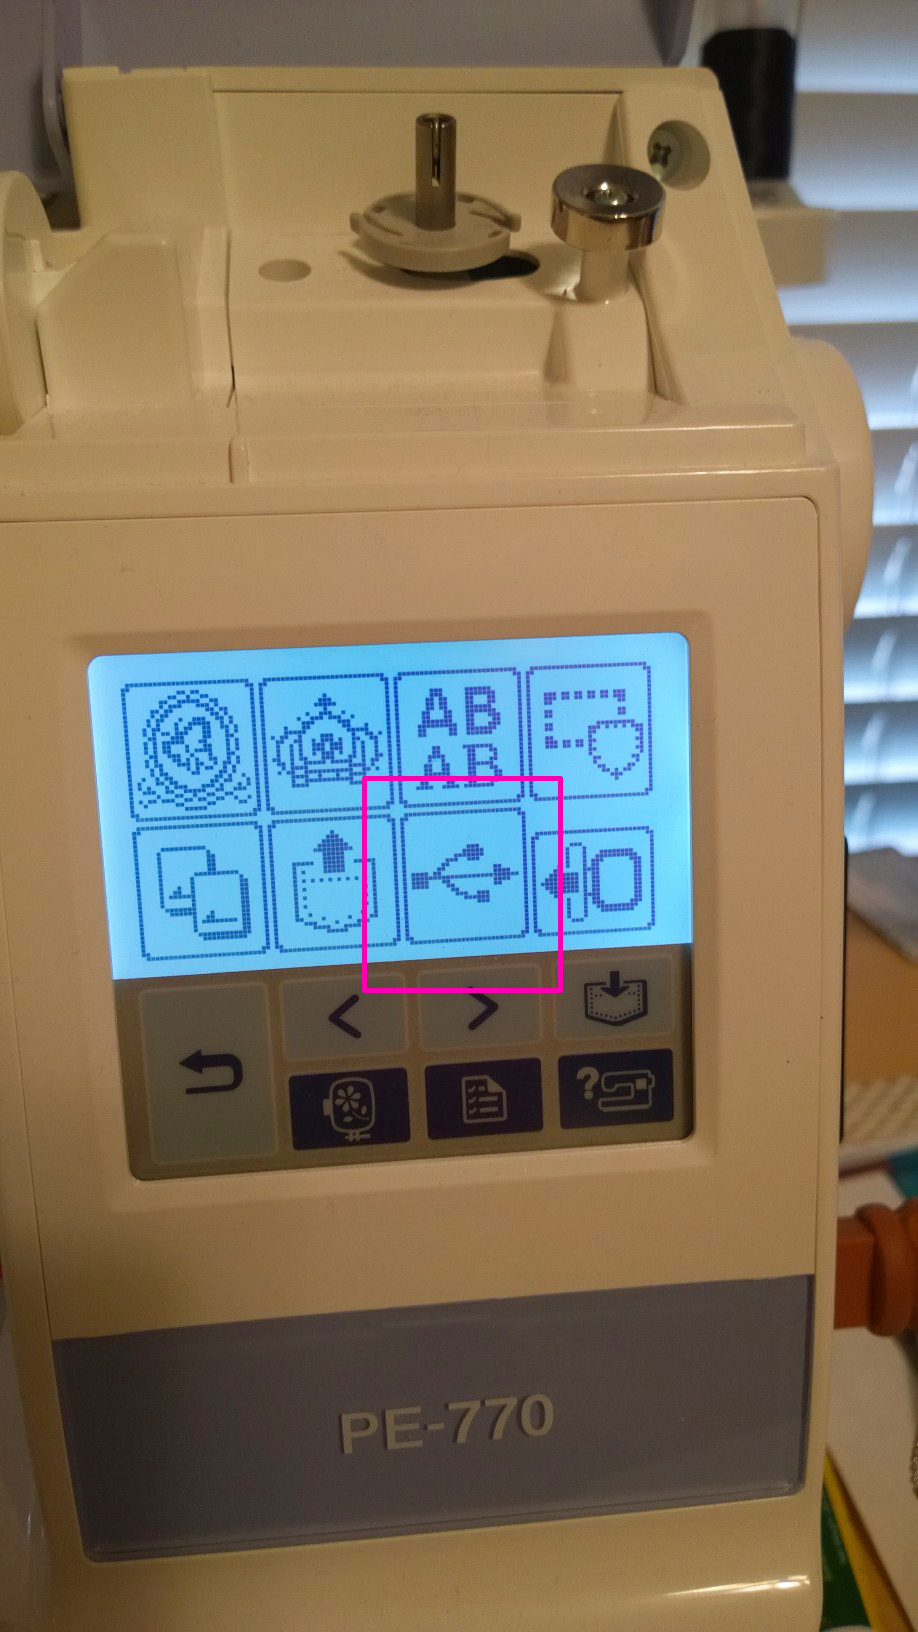 The image below is from before the resizing and it couldn’t see Felix. There’s 9 files on the USB stick, but it only sees 8.
Then after resizing, there’s Felix! The machine sees 9 files and there he is!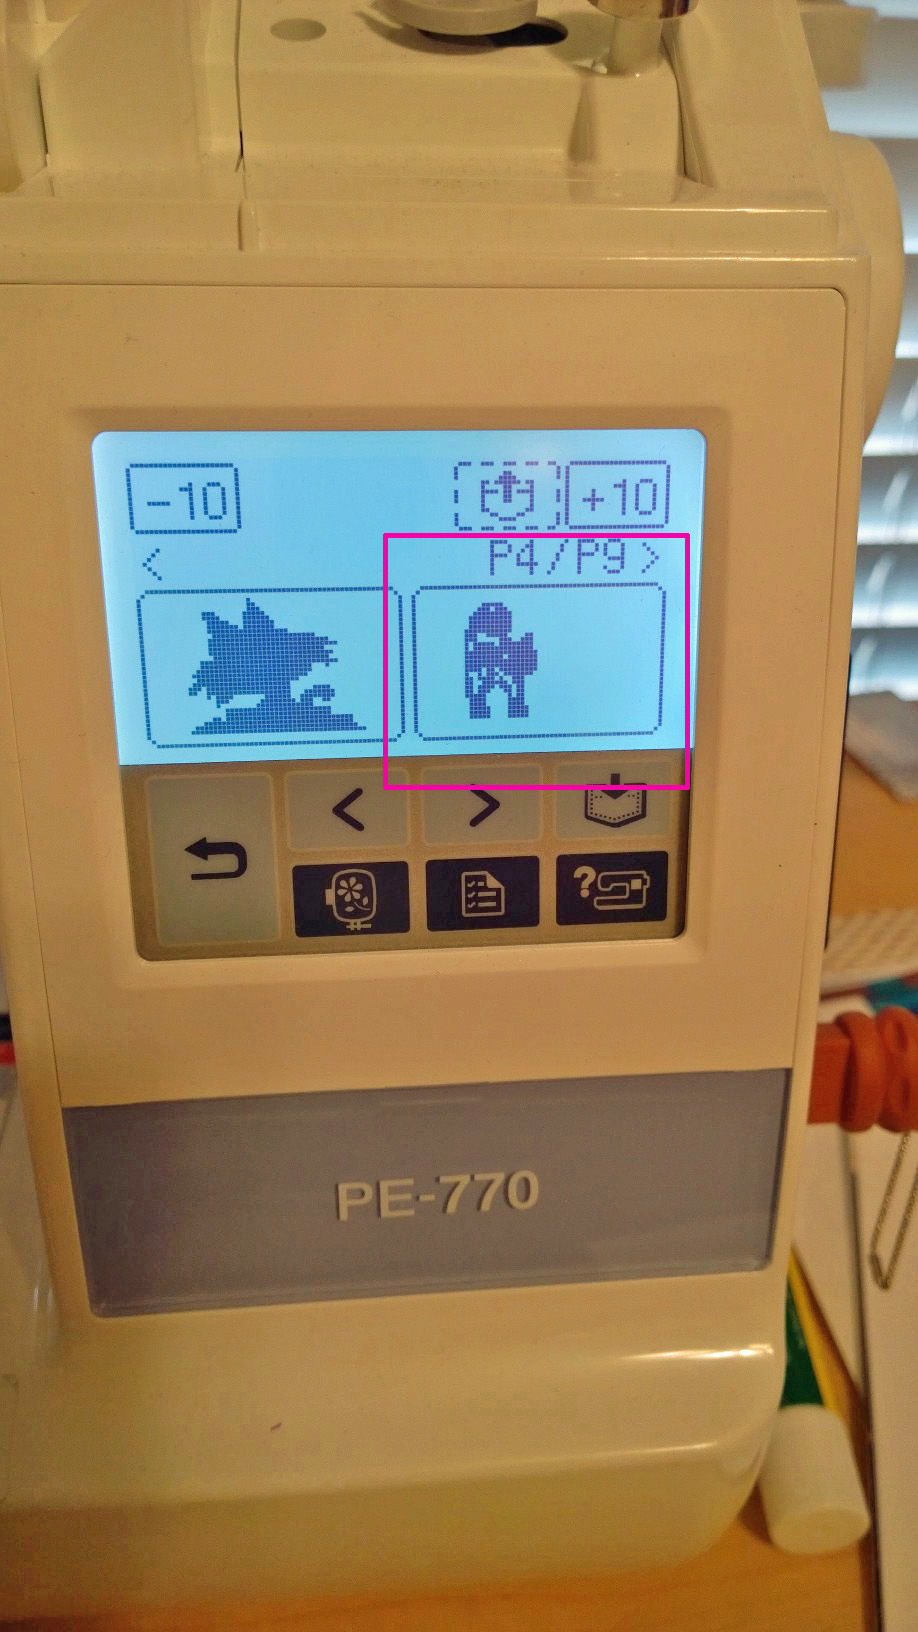
But of course the proof is in the stitching. I think he turned out great! I’ll do some final trimming of the jump threads and he’ll be ready to go!


Without getting bored I thoroughly enjoy whole reading.
Thank you! Glad you enjoyed the read. I’ve been doing more embroidery lately and will be adding more posts like these. 🙂
Consistency and persistency are the key factors to prove you in the field. This blog actually give us an idea of how to be a consistent and persistent in the field.
Do you know if this will hold it’s stitch integrity if going much smaller? I probably try it prior to your response but I am curious 🙂
Thank you for a new program to try. I haven’t had much success with others.
You might have luck with designs but I wouldn’t try it with letters. If you have a program that can remove invisible stitches that may help with a smaller design. Good luck!
Thank you so much for this valuable post – beautifully written and easy to understand. It has made my embroidery hobby so much more accessible 🙂
Do you know if I can use this software to enlarge designs? That has been my frustration! Thanks for this info!!!!
You can to a point so long as you lock the ratios. But if it gets too big, you’ll have to use other (more expensive) software to add in gaps and missing stitches. Good luck!
So pleased to have found this, i am new to machine embroidery and only have the 4 x 4 capabilities this will help me trwmendously.
Glad to help Sue. Check out this post – I linked to you in it. It’s one of many where you’re mentioned on my blog. You’re a sewing inspiration to me! https://powertoolswiththread.com/2017/06/27/embroidered-bbq-apron-towel-and-weekend-projects/
Super! Thank you thank you! You solved my problem. I too, have a Brother PE-770 and all the cool files I want didn’t fit.
Thank you, I am glad I found your post. Your design came out amazing, just curious of how you are able to use the colored fabric to fill in the body of the cat. He looks great
Hi Jewel. The process is called applique. The stitch file is set up to draw a placement line in the correct shape. Then I lay fabric over the placement line to fully cover it. The design then adds a tack down stitch on top of the placement line to hold the fabric in place. I remove the hoop, cut away the excess fabric outside of the tack down stitch, and replace the hoop. The design then does the finishing pretty stitch all around to hide the cut edges. When you see a design for applique, that’s the process to use it. It’s very easy and very fun!
Hello, does any one know of a software to be able to crop larger files and make each part fit our brother machine? Like you can take a larger file and split it into 4 smaller files and line up properly when on the machine? This would really be nice, does not have to be free just affordable and I know that means different things to everyone. Thank you
Hi Patricia, You can use Embrilliance Stitch Artist for what you want. I went a few steps further and purchased a Brother Scan n Cut 650w. I print the embroidery file, scan it in, and upload to the Brother Scan n Cut Canvas (free cloud platform). I can separate pieces and modify in any way. Then I download the file into Brother Simply Applique software. I save as a .pes file and take it to the embroidery machine. I love the Scan n Cut and it’s a great edition to my sewing room.
Thanks for this valuable info. I live in a rural area and it is impossible to get any help/assistance for any embroidery projects, I’m diving in deep water on my own and still afloat. Thanks again for your superb website,
Hi There! I’ve never taken a formal class either. Everything I learned I got from the internet or from just bumbling around. Lindee Goodall, Deborah Jones, & Lisa Shaw have the best instruction on embroidery (I believe) from Craftsy but be sure to look for any videos they offer from YouTube because you’ll find that much of what they show in a Craftsy class is out there for free on YouTube. Deborah Jones has the best lettering instructions, Lindee is best for hooping and Lisa is great with editing on Embrilliance. Enjoy your new craft!
Thanks so much for this help! When I googled how to resize and reduce the stitches your link was one of the first that came up. I had True Sizer but hadn’t really figured it out until reading your post. I was able to reduce the size correctly and dramatically reduce the number of stitches which is very important so as to not break needles and cause buckling.
Thanks again!!
Glad to be of help! Thanks for following my blog! Welcome!
What do you do if you try to resize your paid-for PES file and the Wilcom Software tells you not to go more or less then 10% because without knowing you purchased a PES stitch file? Come to find out most of my files are stitch files.
So glad to have come across your website. I’m new to embroidery and have found tons of lovely embroidery designs that will not fit in my 4×4 machine. Now I don’t feel limited when I find designs I love!
Be careful not to go any larger than 5-10% of the file size or you may run into some trouble. Glad to help.
I have a Mac, I use stitch buddy and allows me very limited editing. I purchased a brother 90e and then went on to purchase the optional larger hoops as suggested in the manual only to find out that the machine will only visibly see any 4×4 files
I feel quite disheartened as all the really good stuff is in bigger hoop size and Im not sure how I can make bigger projects.
You are in the same boat I was with my Brother PE770 since I was limited to 5×7 sizes, which offers a lot more designs than the 4×4, but as my embroidery skills grew, I wanted to also grow my project size. Your larger hoops are nice for cutting out applique while still in the hoop since it gives you a bit more room. But no, sadly a larger hoop does not equate to a larger project – unless that project is digitized for multiple hoopings, and not many 4×4 designs are. I saved up about 3 years and bought a used machine off Craig’s List that could do projects larger than a 5×7. I used my smaller machine like crazy to justify the expense to my husband. lol You’ll get there!
Thank you so much! Great post, but I did skip a few steps – lol. The information is so helpful! Cute and fun project, and I’m sure your friend will be pleased. Just so you know – the link goes to Amazon – but not to lunch box quilts – had to type it into the search bar. Thanks again.
I’m not sure when you wrote this blog. But the software no longer will resize any PES files. It only works with .EMB format 🙁
So sorry. I wrote this post years ago.
I was having the same issue. Just found out if you click “Export Machine File” you can change to .pes file type and save it.
Thank you!!!
thanks, i am new to machine embroidery and this helped A LOT!
Brilliant, thanks
Thank you so much! I cannot tell you how much I needed to find this on. I downloaded it as I was reading and was able to resize the image I had purchased for an item I was trying to make. This will be my go to website for issues such as this.