Rock & Roll Marathon T-Shirt Quilt
I know now for a fact that I married into a family as crazy as I am. My brother-in-law, Marc, started running many years ago. Running. As in, putting on tennis shoes and moving quicker than walking between extreme distances for no other reason than because he could. If that’s not crazy, I don’t know what is. Why on EARTH would you not drive? I’ve always said, “I’m built for comfort, not for speed.” Much like a Cadillac ya know? LOL One of his brood (and he has 9…NINE) has serious issues with Crohns & Colitis so he took up that charity as a reason to run every single Rock & Roll Marathon he could in 2017. Here he is with #8, Wyneth (age 18) following the last race of the year in San Antonio last December. She finished both races WAY before him…because he’s old. lol Hi Marc!

Before they hot-footed it out of town (ha ha), he left me an entire box of shirts from all of his races so I could make him a t-shirt quilt. I’d agreed to this early on in 2017 so it was no surprise. Here’s the pile of shirts on the longarm. They are fairly easy to make since the block is done already but there is a lot of shirt prep that has to occur. This is my second t-shirt quilt. My first was for my husband made from his Harley Davidson shirts.

Here’s some how-to’s to make a t-shirt quilt. There are several schools of thought on stabilizing t-shirts but I always do and have never had a bad outcome. T-shirts, whether cotton or synthetic are made to stretch. The odds of stretch and a crappy outcome are VERY high if the shirts are not stabilized no matter whether they are synthetic or just plain cotton t-shirts. If anyone ever brought me a t-shirt quilt to put on the longarm that wasn’t stabilized, I’d refuse it. Before he left, I order an entire bolt of Pellon 906 Sheerweight and used the entire thing on this soon-to-be king sized quilt.
First, I cut off the sleeves on the body side of the shirt right next to the seam. Reason: if you need any design on the sleeve, you’ll leave the design and any needed seam allowance intact if you cut away on the body side of the sleeve seam. These designs will be used as cornerstones in the sashing.

Then cut off the shoulder seams.

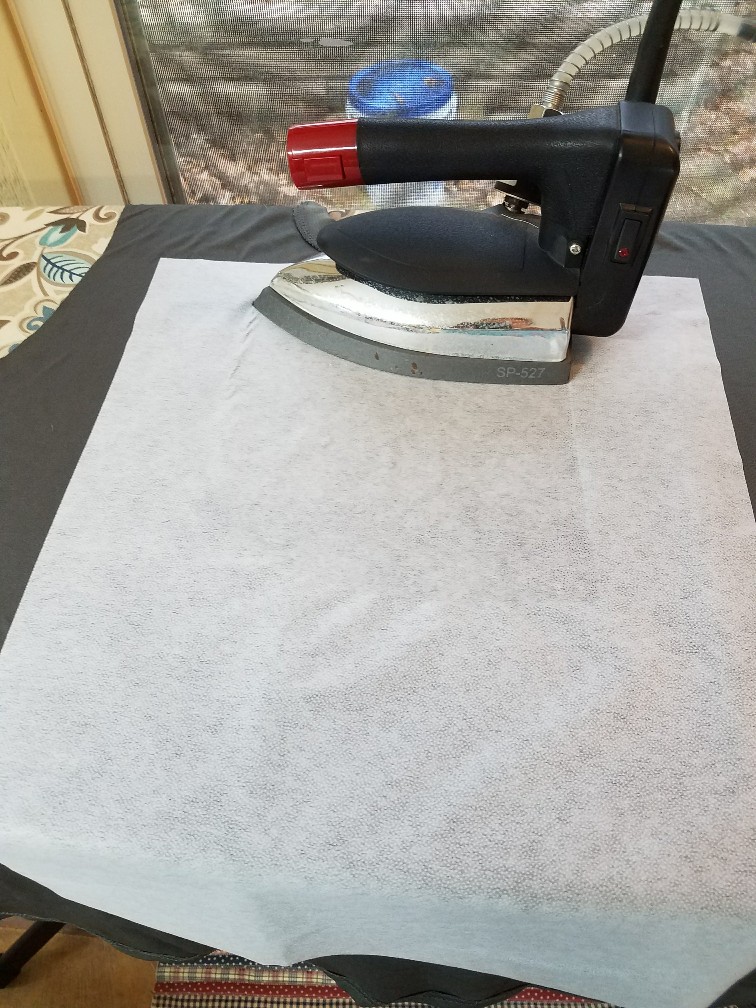
Then cut off the side seams. Take the side of the shirt you want and head to the ironing board.

I cut up 25 pieces of stabilizer (5 shirts across and 5 down) that were large enough to cover the design I wanted + one inch on each side lengthwise. I don’t worry about the height of the design until later but I do put the stabilizer up to the neckline. I do not stabilize the cotton sashing or the borders – only the shirt pieces in the quilt.
Can you tell how wrinkled this design is from the inside? It’s been wadded in a box or suitcase ever since the race. If you don’t press it first, you’ll stabilize the wrinkles which is bad…very bad.

Because the shirts are synthetic, I used a piece of silk organza to press the area without steam. Silk organza is a wonderful pressing cloth because it can take pretty much any heat that any iron wants to give it and leave the fabric underneath without any press marks or shiny spots.

The wrinkles weren’t completely gone, but they were minimal enough to go ahead and stabilize.

I pressed the sheerweight stabilizer onto the fabric vs. ironing it. Again, no steam.
Look how smooth this shirt front turned out. Now it won’t give me any bias-like issues on the longarm or when adding the sashing. Do you notice the Roman numerals above the design? That shirt is #16 in the quilt. I chalk-in a design order for the blocks in Roman numerals on my quilts because neither chalk nor Frixion pens like to make curves in regular numbers. It helps that these shirts are going into the quilt in date order and I have a photo of the approved design, but if I have quilt blocks made of regular fabric, once I like a design, I’ll ID them with numbers like II-IV, which is the 2nd row, 4th block. Works for me. 🙂

Here’s the final agreed-upon layout – in race date order vs. color wise. There will be 2″ sashing in between the columns and rows with the 20 Years Running from the sleeves in the cornerstones and 4 corners of the quilt in the border. The top 3 rows are his half-marathons and the bottom two rows are his 5ks. There’s a sample cornerstone between rows/columns 3 & 4. That’s 227.5 miles of shirts. Like I said, he’s insane. And he’s 60!

I really have to take issue with the shirts for San Antonio. No Alamo? No city skyline with the Tower of the Americas? No Military City USA anything? For a city with an enormous amount of character and the 7th largest in the US, whoever designed these shirts should be fired. Just sayin’. Once the shirt is stabilized, having a quilt ruler for just such a purpose, and a rotating quilt mat is enormously helpful.

I’ll post again when I’m finished! If you are so inclined, he’d appreciate a donation to the Crohns Colitis Foundation. http://online.ccfa.org/goto/marcthompson


I admire you – those T-shirt quilts are very tricky! Have a great week-end I am enjoying the rain! Walking starts on Monday and life begins anew – I bet he will love his quilt! Digestive problems are horrible. I sympathize with the young lady!