Completed: New Look 6184
Supplies: New Look 6184 – View C, 2.5 yards bottom weight woven fabric from Hancock Fabrics, 22” zipper, hook & eye. Total investment: Less than $20.00 with Hancock discounts and coupons.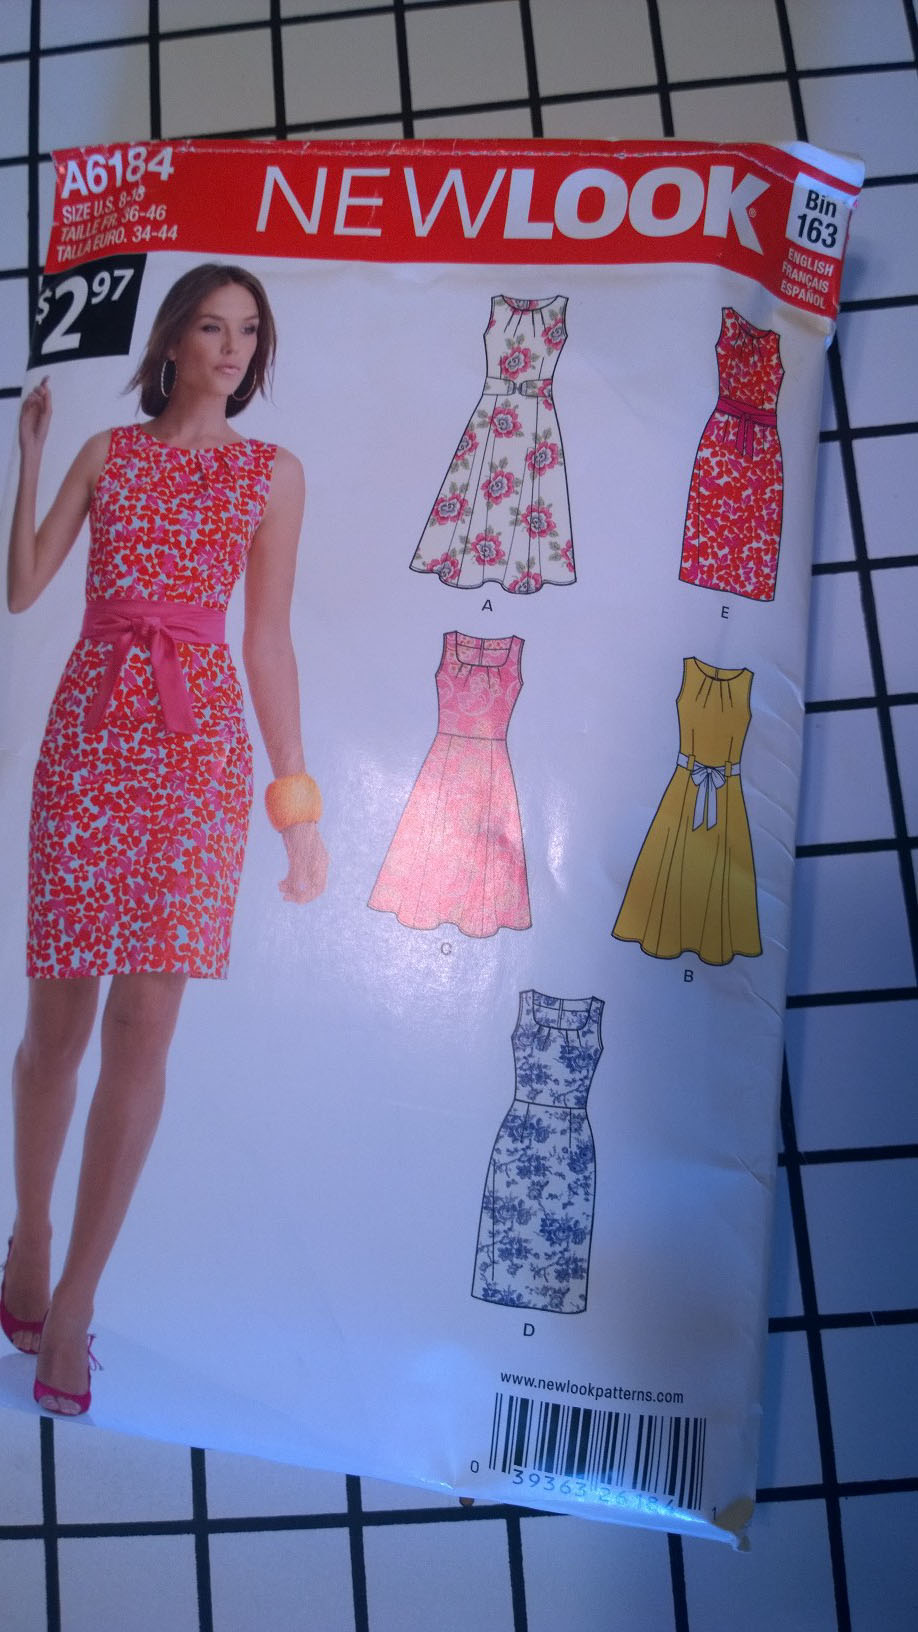
I love this dress. I’ve recently become obsessed with dresses and they are all I wear to work anymore because (read my Creative Fraud page) I don’t have to expend any energy attempting to match a skirt and top. No deciding required…much like my military days! Yay! Just step in and zip. Done. I literally can wear just 4 items of clothing to work including shoes. So no, I’m not going commando. This dress style speaks to me because it doesn’t have my dreaded princess seaming. I always require an FBA so I usually steer clear of princess seams or button downs. If you’re a B cup or less, good for you and whoop-tee-doo. But for the rest of us, the new style of tucks at the neck is Heaven sent! And I’m all about anything sleeveless. Since I had my plumbing removed in ’09, sleeves spell “roaster oven” to me.
I did make a major modification to the dress and that was to change the waistline to an empire waist. Well, to be honest, I made a BUNCH of modifications to this dress. But the empire waist was done because that style hides a multitude of sins. I’ll admit it, I’m lumpy below the waist. I’m not 25 anymore and when a garment waistline hits around my belly button, I have a tendency to balloon out just below the waist seam. Muffin tops are not usually a problem for me since I have a naturally high waist anyway that is higher than midway between the girls and the hips. So the empire looks the most flattering on me. Whoever came up with that way back in-the-day should have been put up for sainthood! I Franken-patterned the bodice by shortening it 2” and added the shortened amount to the waistline ensuring the new waist circumference matched that of the bodice. I pattern-graded the difference to smooth out the join and adjusted the darts accordingly. Wow, looking at this pic my co-worker took, I could stand to lose 10-15. I’ll get right on that.
Now, I did have one major screw up with this pattern. It’s not the first go-round with this dress and I didn’t have the back bodice piece in the package. ???? I have no idea why it wouldn’t be there but it wasn’t. Not even a smaller one I could size up. And I was at the coast doing this make and didn’t have resources to get another bodice piece to copy from. Rats. Can I create one from scratch? Ha, that’s funny. But check this out! A few weeks ago I was wasting time and money in Barnes & Nobel and I picked up “Dressmaking Step by Step; Classic Patterns and Essential Techniques for a Range of Beautiful Garments” by Alison Smith (DK Publishing 2012). This is an awesome book and one of the dresses in there is the classic Empire Waist dress. And even better, there are patterns in the back of the book. They are small but on a graded scale. So I taped together some of my handy-dandy printer paper, drew a 2×2 grid on the paper and eyeballed it from the book to create the back bodice. I was feeling pretty froggy after that save so I strutted around the rest of the afternoon telling hubs he could just call me Sewing Machine MacGyver. He refused and went fishing. Humph!


Lesson Learned: Careful on the cut or you’ll look like you’ve got the eyes of two hurricanes across your shoulders! Note to self: Wear your hair down next time.
Let me introduce Lance. My Deaf Englishman co-worker. Love him to death but I every time I say something he says, “Huh?” Refuses to wear his hearing aids and it drives his British wife crazy. You can see how enthusiastic he is about my sewing.
Next mod: I despise chintz-y facings. None of the quality dresses you find that are RTW have that crappy 1.5” facing around the neckline or arms. No, they all have a hefty wide facing that spans both sides of the bodice. So I re-drafted the facing pieces to mimic my RTW dresses so they span the arms-eye front and back and extend down the chest a bit. Essentially the neck facing becomes a bodice facing and blends with the arm hole facing into a singular unit. It’s fairly easy to do – just use the bodice pieces as patterns and match up all the edges.
Next mod: Widen the shoulders. I know it’s cool in some circles to show bra/tank straps but that’s not me. Especially not me at the office. I HATE to be self-conscious about my bra straps possibly showing while I’m at work so I normally make the shoulder seams a bit wider. The facing has to be graded as well to make this work. Also, I added ½” to the front armholes to keep any armpit pillows from escaping.
Next mod: Lose the arm hole bias tape called for in the pattern. Gag. Again, following my RTW as a guide, they don’t use it. To me, it looks less-professional than the clean finish without it. The very best video to show this is by Colleen Lea found here. ( https://www.youtube.com/watch?v=WBc73i9uXro ) IMO, the bias tape method is ok in casual blouses/tops, but it’s really not what I’m looking for in a dress for the office.

The back facing combined with the back armseye.
The front facing combined into the front armseye. I probably could have deepened the center of the front facing but hey…it’s hot down here in South Texas.
In the video, she showed it using an entire lining, but I just treated the facing unit as the lining and went from there. The results were EXCEPTIONAL! I was absolutely giddy to learn this technique. I have to admit to having to unpick the shoulder seams (because I was following the pattern until I recalled the video). After I was finished, I performed an under-stitch on the graded facings as much as I could…where I could.
A 2.5” blind hem, hook and eye, and it was finished! I’m looking forward to making a few more to work out those little kinks I see here and there. This pattern is totally a work in progress and I know it looks too big on me. But honestly, I was so comfortable all day. Maybe I can perfect that feeling without the look of being a size too big.
Happy Sewing!