Adding Piping – Easy Peasy!
Sew Mama Sew is sponsoring the 2nd Super Online Sewing Match (I love following this; it’s like Survivor with a sewing machine HA). This week’s challenge is for the remaining contestants to sew a set of Carolyn Pajamas from Closet Case Files and the pattern calls for piping. I actually bought this pattern and it’s in my queue waiting for the perfect fabric find. So in honor of the Art of Piping, I thought I would share my experience with adding piping to a project.
I love piping because it adds a great embellishment to an otherwise blah seam. When my daughter-in-law was expecting my 2nd grandbaby, Miss Callie, she sent me a picture of her dream nursery and asked if I would make it for her. Well, of COURSE! And the one she chose was gorgeous. It looked like it has piping of some type on the top of the bumpers and around the crib blanket so I was excited to tackle it. Does my DIL have amazing taste or what?
What is piping? Piping is simply cord wrapped in fabric. That’s it. Cut a strip of fabric wide enough to go around the cord while still leaving enough fabric for seam allowance, enclose the cord by sewing it very close to the edge of the cord on the outside of the fabric, and then sew the seam allowance to the seam where you want the piping to go. How easy is that? Seriously. While you can buy pre-made piping from your local fabric store, I prefer to make my own piping so it matches my project. So I ordered the fabric from the website and got busy. As a side note, all the fabric for this project was just under $125. To order the items pre-made from the website was over $500! Another reason sewing is such a cool thing to have under your belt!
When you see how easy this is, you’ll be piping everything. And of course, being a gadget girl, I needed a gadget to make my piping. (Apologize for the grainy photos – my ISO was up too high on my camera and I didn’t have my glasses on to see the camera screen but you get the idea).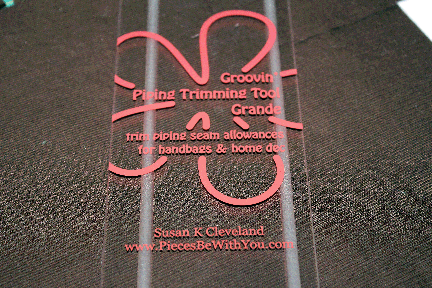
Sometime before the idea of this nursery, I picked up the Grande Groovin’ Piping Tool at quilting store liquidation sale. Don’t you love those sales? All except the part about the store closing ::boo::, but the deals are great! I didn’t need the tool at the time, but the discounted price was too good to pass up. I’d never attempted piping before this tool purchase and I’m so glad I picked it up.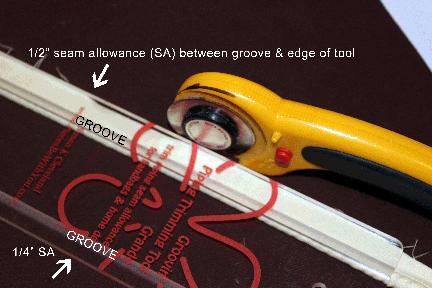
The tool’s main purpose is to provide a steady seam allowance to the inner edge of the cording once it has been covered. Basically it’s a simple piece of plexiglass with a groove going down each side – one groove is 1/4” away from the edge of the tool, and the other is 1/2” away from the edge so the distance of the groove from the edge is the width of the seam allowance. Once I used it I realized I really didn’t need one, because the simplicity of it can be replicated very easily. But now that I have it, I love putting it to use.
This shows the depth of the grooves from the underside of the tool – kinda like a business card holder. Your cording will snug up inside those grooves.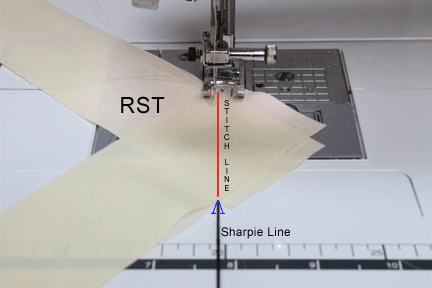
To make the fabric cover for the piping, I cut 2 inch strips of fabric and sewed them together just like for a quilt binding. A 2″ strip was wide enough to go over my piping and still give me enough overhang to allow a 1/2″ seam allowance. Stitch the ends of the fabric strips, right sides together (RST), and sew the diagonal line between the “V” that is formed at the top and bottom of where the two pieces of fabric meet. I cheat and used a Sharpie to actually draw a straight line all the way to the edge of the sewing machine surface so I could keep the lower V straight as I sew (in blue on the image). At first I felt bad like I was putting graffiti on my machine, but I use it so much that when I got my 2nd machine, it was one of the first things I did to it.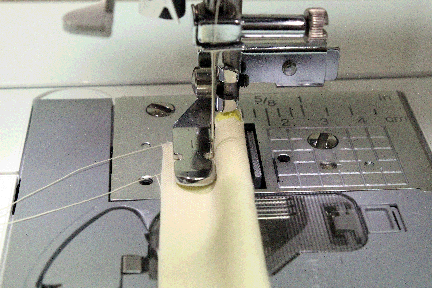
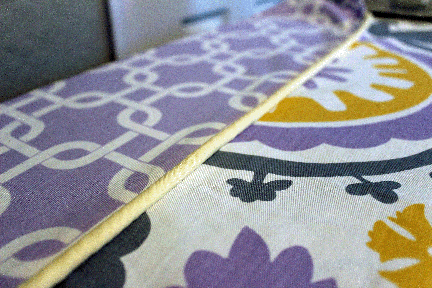
Enclose the cord inside of the strip of fabric. The old-school zipper foot is best for this. The zipper foot that came with my machine will not work at all.
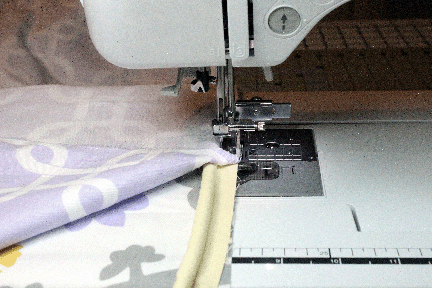
 Now just line up the edges of all three: the bottom and top fabrics RST and the piping with the cord part AWAY from the edge. Stitch as close as possible to the cord.
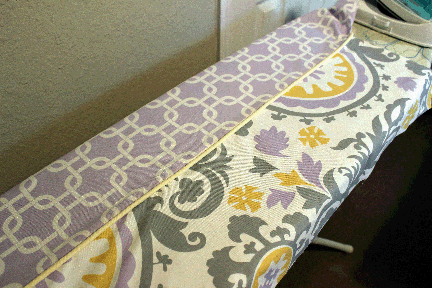
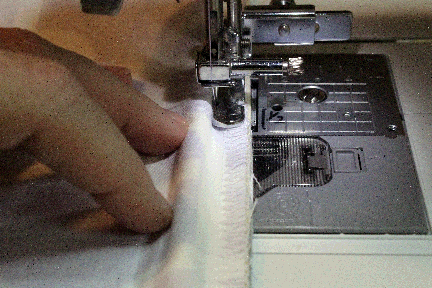
 TA-DAAAAA!! I’m a Piping Hero!